I have decided on a name for my little cafe project. Mabel. I chose this name for several reasons. One, Mabel kinda sounds like Maple and the color on the tank kinda reminds me of that if you use your imagination. It's not quite doo doo brown but, rather, closer to syrup that's been sitting on the plate after enjoying a tall stack. Syrup that's hardened a bit. Second, Mabel is a (or used to be anyways) common name for a female in England. I teach reading and, in the English language, you don't generally have -bel (or -tel, or -ckel). I tell my students it's always -ble (bull), -ckle (cul), or -tle (tul). So...in this way, Mabel goes a bit against the English language grain. Those crazy Brits. So Mabel is kinda like a rebel.
Today I had to take the day off work so that I could get another (my third) injection in my spine. I got home from that good time and took a nap because they really drugged me up proper. When I woke up I decided to go in the garage and play for a bit. If my doctor knew this he would kick my ass. First I grabbed the 42 year old key to Mabel and walked across the street to the locksmith and he was able to cut me a new one when 2 other places couldn't. The original key was in bad shape. You can see it's bent in an odd way. Came back home, put the key in the ignition, and she fired up. This is great because it saves me from swapping in a totally new ignition which is a bit more than the $2.14 this key cost me.

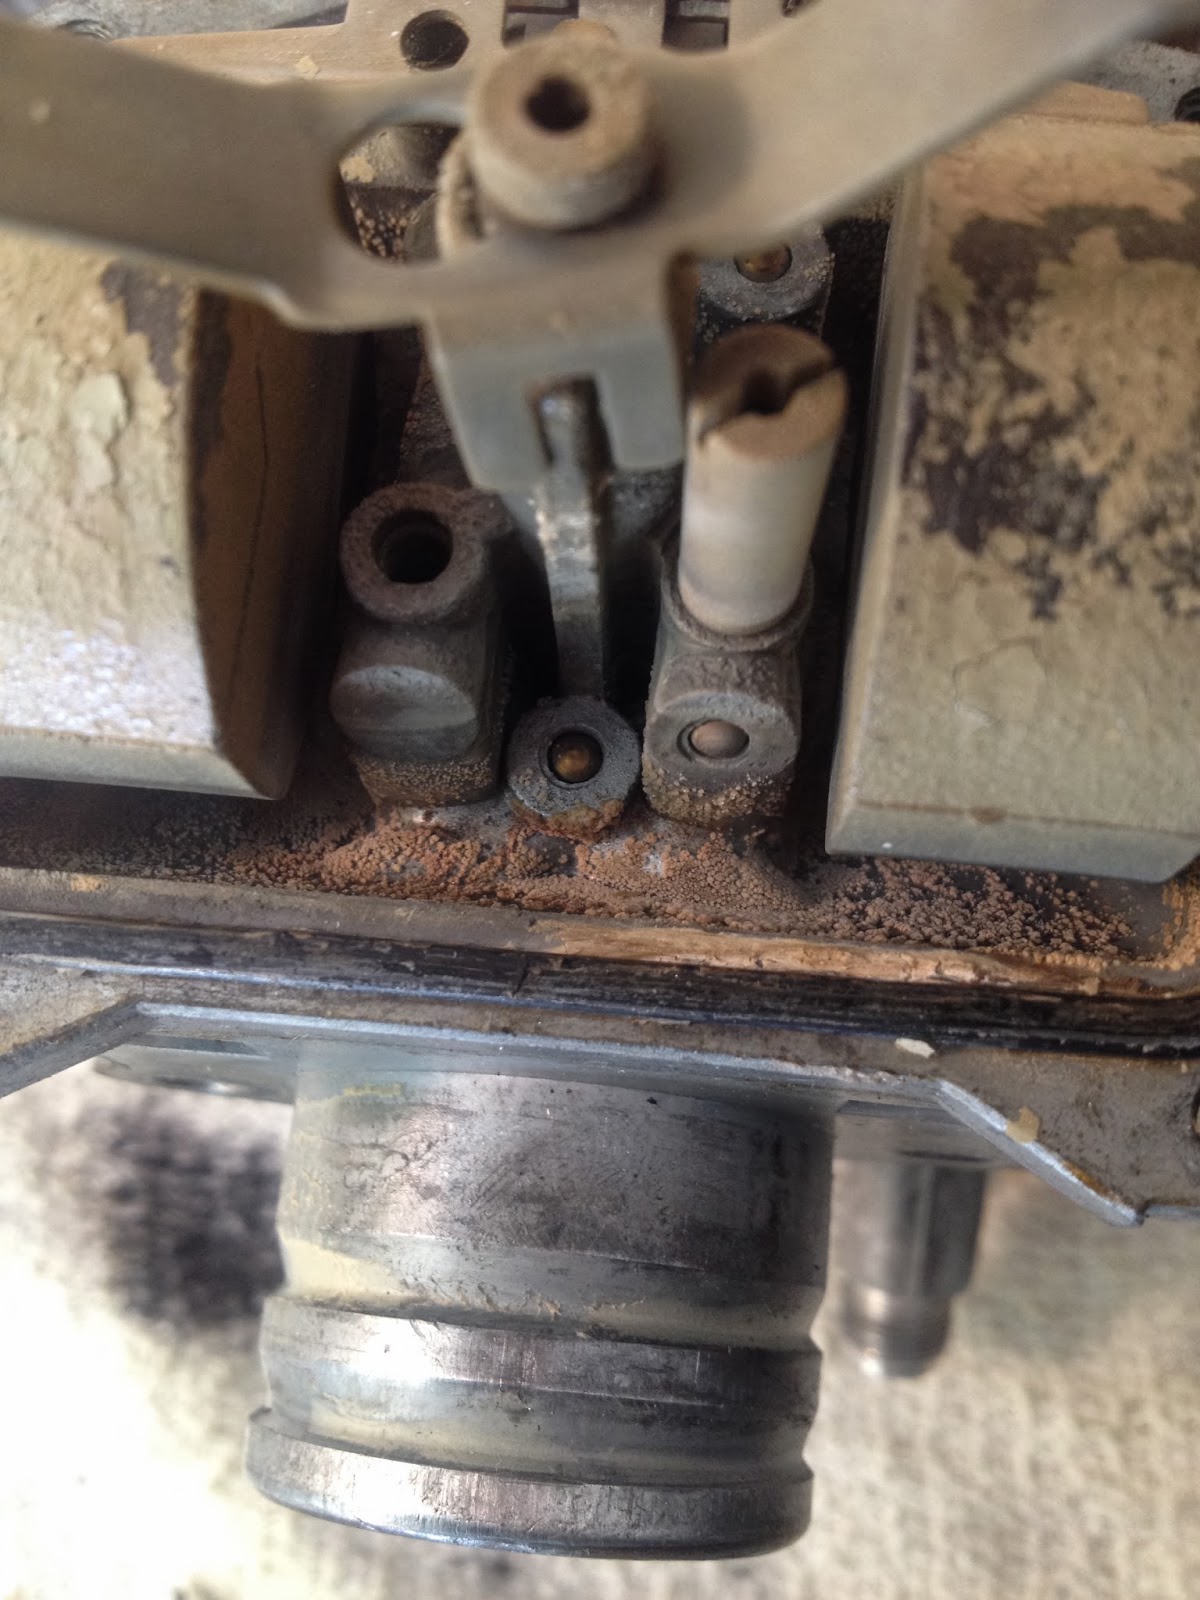
Next I decided to pull the front brake caliper that seized up on me recently. This is is after pulling it. It really wasn't too bad on the inside. I'm betting the rubber hoses are original as there was quite a bit of debris in the caliper. The brake fluid also resembled syrup and that further solidified the name. This is after I sprayed it out with brake cleaner. You can't really see it in this picture (you will down below a ways) but there is a groove cut into the wall of the caliper that a square shaped seal fits into. Then the piston (pictured below) slips down into the caliper. The seal keeps the fluid from leaking out onto the pads. As force is applied at the lever, the fluid pushes the piston out and actually contorts the square shaped seal into more of a parallelogram shape. When the lever is released, the seal is what really helps pull the piston back and keep it from dragging on the rotor. That seal wants to pop back into square shape. Pretty simple. Mine was not allowing the piston the retract and, probably, for a variety of reasons.

This is the piston. It actually looks to be in really good shape. I've seen many of these from 70's bikes that are pitted and rusted and look like total shit and require that a new piston be purcha$ed. I think this one will be good to use again.
You have to be really careful when cleaning this caliper because you do not want to remove any material from the inside as that compromises it's ability to seal the fluid. I wasn't quite sure what to use but I ended up using a combination of a tiny brass brush on the end of a Dremel, rubbing compound, aluminum polish and some extremely mild steel wool. I think it's ready to go but I'll spend a bit more time polishing it up.
Another shot of the piston after a bit of polishing.
And this is the mess that I have created in an effort to rebuild the brake master cylinder. There's really not too much involved in this job but removing a snap ring that holds the innards together looks to be an absolute bitch. Even with a special pair of new snap ring pliers, I'm not exactly sure how I'm going to get at it. The snap ring is currently soaking in brake fluid to try and free it up a bit. Buying an entirely new MC would be so choice but I am trying desperately to keep costs down. Yes, I have issues with cleanliness and that is the reason for the cardboard on my bench. Brake fluid sucks.
While I had the brake stuff out of the way, and the fender removed, I could not help but keep looking at the atrocity that is the finish on these forks. It's disgusting.
This is not acceptable and, if you know me, you know this already. So I broke out the sandpaper and started to smooth things out. My original goal was to break up the chrome and shine on this front end and paint this black but it's getting too cold to paint up here so I'm gonna shine them up (just not sure how far).
I ended up using steel wool, chemicals, a Dremel, and sandpaper and it took 4 hours to get one leg in the ball park. It's still got a long way to go but winters are looong up here and, generally, I have more time than money.
Getting there.
Finally done with the right leg. At least done for today. I developed a splitting headache which has happened after the last 2 spinal injections and needed to call it a day as seeing straight was getting difficult. I'll probably go back over this leg with finer grit paper. Then even finer grit paper and then I'll polish it out. I probably won't get the chance to work on the master cylinder until Friday night. Then I'll put the caliper back together and get those mounted back up. Then I'll measure for the new brake lines. Not sure where I'm going to get them from yet but they will be custom length stainless steel ones. All of this should really transform the way the front brake works.